Table of Contents
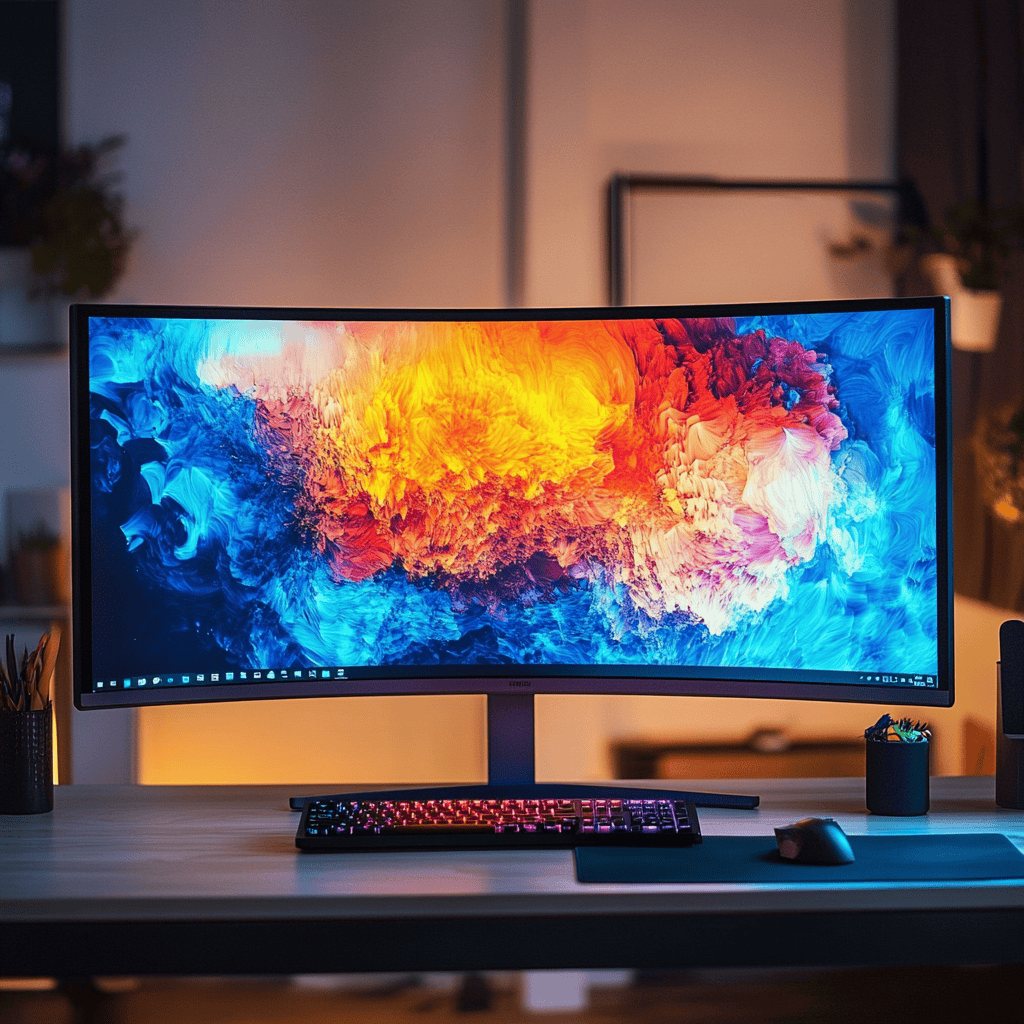
How to Calibrate Your Monitor for the Best Picture Quality
Why Monitor Calibration Is Essential in 2025
You could own a top-tier 4K monitor with stunning specifications, invest in the latest OLED panel with perfect blacks, or splurge on a professional-grade display with exceptional color gamut coverage—but if it’s not properly calibrated, you’re not seeing its true potential or getting full value from your investment. Monitor calibration ensures your display shows colors, brightness, and contrast as accurately as possible based on industry standards, which proves crucial for photo editing, video production, graphic design, gaming optimization, and even day-to-day browsing and productivity work.
The reality is that monitors arrive from the factory configured for showroom appeal rather than accurate color reproduction. Manufacturers often boost saturation, increase brightness beyond comfortable levels, and adjust color temperature to create vibrant, eye-catching displays that stand out in retail environments under harsh fluorescent lighting. These settings look impressive on store shelves but create inaccurate color representation, excessive eye strain during extended use, and inconsistency when your work is viewed on other properly calibrated displays or printed.
Whether you’re a creative professional whose livelihood depends on accurate color reproduction, an enthusiast photographer sharing work online, a gamer seeking optimal visual settings for competitive advantage or immersion, or simply someone who wants their monitor to look its best for everyday computing, calibrating your screen delivers meaningful improvements across multiple dimensions. Proper calibration improves color consistency across different devices and viewing platforms, reduces eye strain and fatigue during extended computer use, ensures your creative work looks exactly as intended when clients view it, eliminates the frustration of prints that don’t match screen colors, and maximizes the visual quality potential of the display hardware you’ve already purchased.
The process need not be intimidating or expensive—basic calibration using free built-in operating system tools takes only 10-15 minutes and delivers noticeable improvements for casual users, while professional hardware calibration provides the precision that serious creative work demands. Both approaches prove worthwhile investments of time and potentially modest financial resources that pay ongoing dividends through improved visual quality and reduced eye strain every time you use your computer.
Understanding that even professional-grade monitors benefit from calibration helps frame its importance. Factory calibration certificates included with premium displays document initial accuracy, but panel characteristics shift during shipping, storage, and use. Regular recalibration compensates for these changes and ensures ongoing accuracy throughout the display’s lifespan.
What Is Monitor Calibration?
Monitor calibration is the systematic process of adjusting your monitor’s settings and creating custom color profiles so that it displays true-to-life colors, correct brightness levels, and optimal contrast based on established industry standards like sRGB, AdobeRGB, or DCI-P3 color spaces. The goal involves making your display reproduce colors as accurately as possible within its technical capabilities, matching industry reference standards that ensure consistency across different devices and viewing platforms.
The calibration process addresses several fundamental display characteristics that factory settings rarely optimize correctly:
Brightness (Luminance) determines how much light the display emits, measured in candelas per square meter (cd/m² or nits). Proper brightness settings prevent eye strain from excessive light output while ensuring sufficient illumination for clear image viewing. Standard recommendations suggest 120 cd/m² for general use or 100 cd/m² when matching print output.
Contrast Ratio defines the relationship between the brightest white and darkest black your monitor can display. Proper contrast adjustment ensures whites appear clean without crushing detail in highlights, while blacks remain deep without losing shadow information.
Color Temperature (measured in Kelvin) determines the warmth or coolness of white displayed on your monitor. The industry standard of 6500K (D65) approximates daylight and creates neutral whites that neither skew warm (yellow) nor cool (blue). This standardization ensures color consistency when work is viewed under different lighting conditions or on other calibrated displays.
Gamma describes the mathematical relationship between input signal values and displayed brightness, creating a curve that determines how mid-tones are rendered. The standard gamma of 2.2 matches how human vision perceives brightness changes and aligns with sRGB and video content standards, while gamma 2.4 is sometimes used for print workflows.
Color Accuracy involves adjusting how faithfully the monitor reproduces specific colors across the entire gamut. Calibration creates lookup tables (LUTs) that correct deviations between displayed colors and reference standards, minimizing Delta E (color error) values to ensure reds appear truly red, greens render accurately, and all colors across the spectrum match intended values.
You can accomplish calibration through two primary methods—manual adjustment using built-in operating system tools that provide basic calibration through visual comparison and manual setting adjustments, or professional hardware calibration using colorimeters (devices that objectively measure displayed colors and create precise correction profiles automatically). Both approaches prove valid depending on accuracy requirements and budget constraints.
What You’ll Need
The tools required for monitor calibration range from free software built into your operating system to professional-grade hardware that costs several hundred dollars. Your choice depends on accuracy requirements, professional needs, and budget availability.
Option 1: Hardware Calibration Tools
Best For: Professional photographers, graphic designers, video editors, colorists, and anyone whose work demands precise color accuracy that directly impacts client satisfaction or professional output quality.
Hardware calibrators (also called colorimeters or spectrophotometers) objectively measure the actual colors your monitor displays and automatically generate correction profiles that compensate for any deviations from target values. This objective measurement eliminates the subjective guesswork inherent in visual calibration methods and provides repeatability that manual techniques cannot match.
Popular Hardware Options:
Datacolor SpyderX Pro ($170-200) represents an excellent entry point for serious enthusiasts and emerging professionals. The device uses lens-based color sensors to measure displayed colors accurately, provides fast calibration in under two minutes, supports unlimited monitor calibration for users with multiple displays, and includes ambient light monitoring to suggest optimal workspace lighting. The SpyderX Pro works with LCD, LED, OLED, and even projector displays, handling standard and wide-gamut panels equally well.
X-Rite i1Display Studio ($200-250) delivers professional-grade accuracy in a mid-range package that balances precision with affordability. The colorimeter features advanced color engine technology for accurate measurements across diverse panel types, supports unlimited display calibration including laptops and external monitors, provides both basic and advanced calibration modes for different skill levels, and includes validation features to verify calibration accuracy. This device particularly suits photographers and designers who need reliable color matching between capture, editing, and output.
Calibrite ColorChecker Display Pro (formerly X-Rite i1Display Pro, $250-350) represents the professional standard for color-critical work in photography, video production, and design studios. The device offers exceptional accuracy across all monitor types including emerging technologies, supports advanced features like projector calibration and video calibration for HDR workflows, provides expert console mode with complete control over calibration parameters, and includes quality assurance features for verifying and maintaining calibration over time. Professional colorists and high-end retouchers particularly appreciate the repeatable precision this level of equipment delivers.
Key Hardware Calibrator Advantages: Objective color measurement eliminates subjective visual interpretation, automated profile creation removes guesswork from the calibration process, consistent results ensure repeatable accuracy across calibration sessions, support for advanced color spaces including AdobeRGB and DCI-P3, and validation features that verify calibration accuracy and identify when recalibration becomes necessary.
Option 2: Built-In Software Tools
Best For: Casual users, students, budget-conscious enthusiasts, and anyone seeking noticeable improvement over factory settings without investing in specialized hardware.
Modern operating systems include calibration utilities that guide users through visual adjustment processes, creating basic color profiles that improve accuracy compared to uncalibrated factory settings. While these tools cannot match hardware calibrator precision due to reliance on subjective visual assessment, they deliver meaningful improvements at zero cost.
Free Built-In Options:
Windows Display Color Calibration provides step-by-step wizards that guide users through gamma adjustment using test patterns, brightness and contrast optimization with visual reference images, and color balance fine-tuning to achieve neutral grays. Access the tool by searching “Calibrate display color” in the Windows search bar. The wizard presents reference images showing proper gamma, brightness, and contrast, allowing users to adjust settings until their display matches the reference patterns as closely as possible.
macOS Display Calibration Assistant offers similar functionality with Apple’s characteristic attention to user-friendly design. The utility walks users through white point selection (choosing target color temperature), gamma adjustment for proper mid-tone rendering, and brightness optimization for comfortable viewing. Access it through System Settings > Displays > Color > Calibrate. The macOS tool provides slightly more sophisticated options including expert mode with additional control over calibration parameters.
Monitor-Specific Software from manufacturers like ASUS ProArt, Dell UltraSharp, BenQ Designer, and LG’s OnScreen Control sometimes includes calibration utilities optimized for specific panel characteristics. These applications may provide preset color modes for different workflows (sRGB, AdobeRGB, DCI-P3), 6-axis color adjustment for fine-tuning specific hues, and uniformity compensation for brightness and color consistency across the screen surface. Check your monitor manufacturer’s website for available software tools.
Online Calibration Resources supplement built-in tools with test patterns and reference images. Websites like Lagom LCD Test Pages (lagom.nl/lcd-test), Photo Friday’s monitor calibration tool, and TestUFO provide specialized test patterns for evaluating and adjusting specific characteristics including black level and white saturation, viewing angle uniformity, response time and motion blur, color gradients and banding, and pixel defects and uniformity issues.
Software Tool Limitations: Visual calibration relies on subjective interpretation that varies between users and environmental conditions, cannot measure actual displayed colors objectively, provides less precise corrections compared to hardware measurement, and offers limited verification of achieved accuracy. Despite these limitations, software tools deliver substantial improvements over uncalibrated displays for users not requiring professional-grade precision.
Step-by-Step Guide: How to Calibrate Your Monitor
Proper calibration follows a systematic process that ensures consistent, accurate results. Whether using hardware colorimeters or built-in software tools, these fundamental steps apply.
Step 1: Let Your Monitor Warm Up
Turn on your monitor and let it run for at least 15-30 minutes before beginning calibration. This warm-up period proves essential because LCD backlights require time to reach stable operating temperature and consistent light output, color characteristics shift during the first minutes of operation, and brightness stabilizes only after thermal equilibrium is reached.
Professional calibration protocols often specify 30-60 minute warm-up periods, particularly for critical color work. The extra time ensures complete thermal stability and eliminates variables that could affect calibration accuracy. During warm-up, use the monitor normally—the goal involves reaching typical operating conditions rather than simply having the display powered on.
Cold monitors produce inaccurate calibration results because brightness may be higher or lower than stabilized values, color temperature shifts during warm-up create moving targets, and calibration profiles generated for cold displays won’t match stabilized performance. Investing the modest time for proper warm-up ensures calibration accuracy that reflects actual working conditions.
Step 2: Reset to Factory Settings
Start with a clean slate by resetting your monitor to default factory settings. This critical step removes any previous custom adjustments, filters, or color modes that may distort the calibration process or create unpredictable interactions with new calibration profiles. Accumulated tweaks from previous owners, legacy settings from different workflows, or forgotten adjustments often create unexpected color shifts that complicate calibration.
How to reset: Access your monitor’s on-screen display (OSD) menu using the physical buttons on the monitor bezel or base, navigate to the Settings or Setup menu section, locate the “Reset” or “Factory Reset” option, and confirm the reset operation. Some monitors require holding specific button combinations—consult your user manual if the reset option isn’t immediately obvious.
After resetting, verify that all picture modes are set to “Standard” or “Custom” rather than specialized modes like “Gaming,” “Movie,” or “sRGB” which may apply additional processing that interferes with calibration. Disable any adaptive brightness features, blue light filters, or dynamic contrast adjustments that would conflict with consistent color reproduction.
Step 3: Adjust Room Lighting
Your viewing environment significantly affects color perception and calibration effectiveness. Human eyes adapt to surrounding lighting conditions, causing the same displayed color to appear different under varying ambient light. Professional color work demands controlled lighting environments that remain consistent during calibration and subsequent use.
Environmental Factors to Control:
Avoid direct sunlight on the screen which creates glare, washes out colors, and forces eyes to adapt to bright conditions that skew color perception. Close blinds or curtains during daytime calibration, or schedule calibration during evening hours when natural light doesn’t factor.
Eliminate overhead lighting with harsh color temperature that casts colored light onto the display or surrounding workspace. Standard office fluorescent lights often skew cool (blue), while incandescent bulbs trend warm (yellow)—either can influence perceived monitor colors through reflected light and eye adaptation. Consider dedicated daylight-balanced LED desk lamps (5000-6500K color temperature) that provide consistent neutral lighting.
Minimize colored walls and surfaces immediately surrounding your monitor. Brightly colored walls reflect colored light onto your workspace and the monitor surface, affecting color perception. Professional color grading bays use neutral gray walls (approximately 50% gray) to eliminate color contamination, though this proves impractical for most home and office environments. Simply being aware that bright red or blue walls can influence color perception helps you compensate mentally.
Maintain consistent lighting conditions between calibration and subsequent use. Calibrating in bright daylight but working during evening with artificial lighting creates mismatch between calibration conditions and actual working environment. Ideally, calibrate under the lighting conditions most typical for your actual work sessions.
Professional environments often use viewing booths with standardized D50 (5000K) or D65 (6500K) lighting for critical color evaluation, ensuring consistent viewing conditions regardless of time of day or external lighting variations. While impractical for most users, understanding the importance of controlled lighting emphasizes why even basic attention to environmental factors improves calibration effectiveness.
No products found.
Step 4: Use Calibration Software or Hardware
The calibration process differs significantly depending on whether you’re using professional hardware colorimeters or built-in software tools, though the fundamental goals remain consistent—accurate color reproduction and proper brightness/contrast settings.
For Hardware Calibrators
Plug in the calibration device via USB to your computer and install the manufacturer’s companion software if you haven’t already. Modern colorimeters typically include comprehensive calibration suites that guide users through the entire process with clear instructions and visual feedback.
Position the colorimeter on your screen according to manufacturer instructions—typically centered on the display with the sensor facing the screen. Most devices use suction cups or counterweights to hold the sensor in position during measurement. Ensure the sensor sits flush against the screen without gaps that could admit ambient light.
Launch the calibration software and select your monitor from detected displays (important for multi-monitor setups). Choose calibration targets appropriate for your workflow:
Brightness/Luminance: Set to 120 cd/m² for general use, 100 cd/m² for print matching, or 140-160 cd/m² for HDR content creation. The software will measure current brightness and instruct you to adjust monitor brightness controls until target luminance is achieved.
White Point: Select 6500K (D65) for standard work matching daylight viewing conditions, 5000K (D50) for print-focused workflows matching standard print viewing booths, or native white point to calibrate without shifting the panel’s inherent color temperature.
Gamma: Choose 2.2 for standard video and sRGB workflows (the most common selection), 2.4 for print-focused work or darker viewing environments, or L* (L-star) for special photography workflows.
Color Gamut: Select sRGB for web and general work, AdobeRGB for photography and print, DCI-P3 for video editing, or native gamut to calibrate to the panel’s maximum color range.
Follow on-screen prompts as the software displays a series of color patches and measures the colorimeter’s readings. The automated process typically takes 2-10 minutes depending on thoroughness settings, measuring grayscale accuracy across brightness levels from black to white, primary and secondary color accuracy (red, green, blue, cyan, magenta, yellow), color uniformity across different saturation levels, and gamma curve accuracy through the tonal range.
Review calibration results showing before/after comparisons, Delta E measurements indicating color accuracy (lower is better, with <2 considered excellent), and recommendations for whether recalibration is needed or results are acceptable.
Save the calibrated color profile with a descriptive name (e.g., “Studio Monitor – AdobeRGB – 2025-01” including date for version tracking) and set it as the active profile for your display. The software typically handles profile installation and activation automatically, though you can manually verify in operating system color management settings.
For Built-In Tools (Windows/macOS)
Windows Display Color Calibration:
Open the Start menu and search for “Calibrate display color” or navigate through Settings > System > Display > Advanced display settings > Display adapter properties > Color Management > Advanced > Calibrate display.
The calibration wizard guides you through several adjustment stages:
Gamma Adjustment: The wizard displays test patterns with a central dot that should barely be visible against the background. Adjust your monitor’s gamma setting (or use the software slider if hardware adjustment isn’t available) until the central dot becomes just barely visible—too visible indicates gamma is too high, while invisible suggests gamma is too low.
Brightness Adjustment: Reference images show proper brightness where the suit (in the classic Windows calibration image) remains distinct from the black background while the X remains barely visible. Adjust monitor brightness controls until your display matches the reference as closely as possible—too bright washes out the blacks, while too dark obscures shadow detail entirely.
Contrast Adjustment: The reference shows white shirt detail that should remain visible without glowing or blooming. Adjust monitor contrast until whites appear clean and bright while maintaining detail in highlight areas—excessive contrast crushes highlights to pure white, while insufficient contrast makes whites appear gray.
Color Balance: The wizard displays grayscale gradients that should appear truly neutral without color casts. Adjust RGB sliders until the grayscale appears neutral from black through mid-tones to white without red, green, or blue tints.
Save your calibration and set it as the default color profile for the display.
macOS Display Calibration Assistant:
Navigate to System Settings > Displays > Color and click the “Calibrate…” button to launch the Display Calibrator Assistant.
Check “Expert Mode” if available for additional control over calibration parameters (uncheck for simplified streamlined process).
Follow the assistant through similar adjustment stages:
Select target gamma: Usually 2.2 for standard work, with visual reference showing how different gamma settings affect image appearance.
Select target white point: Choose between native white point or specific color temperatures (5000K, 6500K, 9300K) based on your workflow requirements.
Adjust brightness and contrast using visual comparison methods similar to Windows, with reference images showing proper settings.
Name and save your profile with descriptive information for future reference.
Set the new profile as active for your display (usually automatic).
Step 5: Adjust Key Picture Settings
Beyond basic calibration, several monitor settings significantly impact image quality and viewing comfort. Understanding proper values for each setting ensures optimal performance.
Brightness (Backlight Level) should be adjusted so light colors and whites appear bright and clean without washing out to pure white that loses detail, dark content remains visible without forcing excessive eye strain, and overall viewing comfort is maintained during extended use without excessive eye fatigue. The proper brightness level depends heavily on ambient lighting—brighter rooms allow higher monitor brightness, while darker environments require lower settings to prevent eye strain.
Target values: 120 cd/m² (nits) for general use in typical office lighting, 100 cd/m² for print matching workflows, 80-100 cd/m² for dark room use or evening work, or 140-160 cd/m² for brighter environments or HDR content creation. Hardware calibrators measure and set this precisely, while software calibration requires subjective judgment using reference images.
Contrast determines the relationship between brightest white and darkest black. Proper adjustment ensures whites appear clean and bright without blooming or crushing highlight detail, blacks remain deep without crushing shadow information to pure black, and the overall image shows good separation between tonal values. Most monitors should keep contrast at or near default factory settings (typically 70-80 on a 0-100 scale), as excessive contrast adjustment can create clipping in highlights or shadows.
Gamma controls the mathematical relationship between input values and displayed brightness, affecting how mid-tones render. Set to 2.2 for standard content matching sRGB color space and most video content, 2.4 for print-focused workflows or darker viewing environments where additional mid-tone contrast benefits image evaluation, or L-star (L)* for specialized photography workflows matching human brightness perception. Incorrect gamma makes images appear too bright and washed out (gamma too low) or too dark with crushed shadows (gamma too high).
Color Temperature determines the warmth or coolness of displayed white. Set to 6500K (D65) for standard work matching daylight conditions and industry color standards, 5000K (D50) for print workflows matching standard print viewing booth illumination, native to use the panel’s inherent color temperature without adjustment, or avoid extreme settings like 9300K (very cool/blue, common in older monitors but not color-accurate) or very warm settings unless specifically required for specialized work.
Sharpness should generally remain neutral or slightly below maximum (typically 40-60 on a 0-100 scale) to avoid edge enhancement artifacts. Excessive sharpness creates haloing around text and high-contrast edges, introduces artificial-looking oversharpening that doesn’t represent actual image detail, and can cause eye fatigue from over-enhanced edges. Some monitors benefit from sharpness slightly below 50% to eliminate processing artifacts entirely, displaying pure pixel information without enhancement.
Disable Dynamic Features that interfere with consistent color reproduction including dynamic contrast (which automatically adjusts contrast based on content, creating inconsistent appearance), adaptive brightness (which changes brightness based on content or ambient light, preventing consistent calibration), blue light filters (which shift color temperature warm, destroying color accuracy), and eco/power saving modes (which may reduce brightness or adjust settings to save energy at the cost of color consistency).
How to Save and Apply Your Color Profile
Once calibration is complete, the resulting correction data is stored as an ICC (International Color Consortium) or ICM (Image Color Matching) profile—a standardized file format that tells your operating system and color-managed applications how to interpret and display colors on your specific monitor. These profiles contain lookup tables that correct deviations between your display’s natural characteristics and target color standards.
Understanding Color Profiles
Color profiles serve as translation dictionaries between different color devices (monitors, printers, scanners, cameras) ensuring consistent color appearance across different platforms. Your monitor profile specifically describes how your display reproduces colors, what corrections are needed to match industry standards, and which color gamut the display has been calibrated to (sRGB, AdobeRGB, etc.).
System-level profiles affect how the operating system and all color-managed applications display content on your monitor, while application-specific profiles may be used by professional software like Adobe Photoshop, Lightroom, or Premiere Pro which can recognize and utilize ICC profiles for accurate color preview.
Installing and Activating Profiles
On Windows:
Navigate to Settings > System > Display > Advanced display settings > Display adapter properties for your monitor, click the Color Management tab, click Color Management… button, select the Devices tab and choose your monitor from the list, check “Use my settings for this device”, click Add… to browse for ICC/ICM profile files if needed (hardware calibrators typically install profiles automatically), select your newly created calibration profile, click “Set as Default Profile” to make it active, and click Close to apply changes.
On macOS:
Navigate to System Settings > Displays > Color (or System Preferences > Displays > Color on older macOS versions), you’ll see a list of available color profiles for the selected display, select your newly created calibration profile from the list (usually at the top after calibration), and the profile activates immediately upon selection.
Verify activation by confirming the calibrated profile appears selected in color management settings and checking that date stamps on the profile match your recent calibration session (eliminates confusion with older profiles).
Managing Multiple Profiles
Users with different workflow requirements may create multiple calibration profiles optimized for various scenarios:
sRGB profile for web design and general use where content targets standard web color space, AdobeRGB profile for photography and print work requiring wider color gamut, DCI-P3 profile for video editing and HDR content creation, evening/night profile with reduced blue light for comfortable late-night work (accepting reduced color accuracy as trade-off for eye comfort).
Switch between profiles as needed based on current tasks, though frequent switching can become tedious. Many professionals maintain separate monitors for different workflows—perhaps a wide-gamut AdobeRGB display for editing paired with a standard sRGB display for web preview.
When Should You Re-Calibrate Your Monitor?
Monitor characteristics naturally drift over time as backlights age, panel properties shift, and environmental factors affect performance. Regular recalibration compensates for these changes and maintains color accuracy throughout the display’s operational life.
Recommended Calibration Frequency
Professional creative work (photographers, colorists, designers): Calibrate every 2-4 weeks to maintain the precision that client work demands. Professional color grading facilities often calibrate weekly or even daily for mission-critical projects where color accuracy directly impacts deliverable quality and client satisfaction.
Serious enthusiasts and semi-professional use: Calibrate monthly to maintain good accuracy for personal projects, portfolio work, and semi-commercial applications where color accuracy matters but doesn’t require absolute professional-grade precision.
General users and casual creative work: Calibrate every 3-6 months as displays drift slowly enough that quarterly or semi-annual recalibration maintains acceptable accuracy for non-critical applications. Even casual users benefit from periodic recalibration to compensate for aging backlight color shifts.
Specific Events Requiring Recalibration
Beyond time-based intervals, certain events necessitate recalibration regardless of how recently you last calibrated:
After major operating system updates that may reset color profiles or modify color management systems (macOS major version updates particularly affect display management), verify your calibration profile remains active and consider recalibrating if colors appear noticeably different post-update.
After graphics driver updates that can reset color settings, change gamma handling, or modify how color profiles are applied. Check color management settings after driver updates and recalibrate if you notice color shifts or if validation tests show increased Delta E values.
When moving to a new workspace with different lighting conditions, as ambient light significantly affects color perception and optimal brightness settings. The calibration profile created for bright office lighting may not serve well in a darker home office environment, necessitating new profiles optimized for actual working conditions.
If you notice color shifts or changes in how your monitor displays familiar content—perhaps photos you know well appear different, or prints stop matching screen preview accurately. These symptoms often indicate drift that recalibration will correct.
After significant backlight aging (typically 2-3 years of heavy use) when LED or CCFL backlights begin yellowing or losing brightness. Color temperature often shifts warm as backlights age, and recalibration compensates for these changes until backlight degradation becomes severe enough to warrant display replacement.
Before critical projects where color accuracy directly impacts deliverables—client photography sessions, commercial video projects, print campaigns. Recalibrating immediately before important work ensures maximum accuracy when it matters most.
Validation Without Full Recalibration
Hardware calibrators often include validation features that measure current display accuracy without creating new profiles. These quick measurements (typically 1-2 minutes) show whether Delta E values remain acceptable or whether full recalibration is warranted. Run validation tests monthly to determine whether displays still meet accuracy requirements or need recalibration.
Frequently Asked Questions: Monitor Calibration in 2025
Do I really need a hardware calibrator?
If you’re a professional editor, photographer, designer, or colorist whose work involves color-critical applications, yes—hardware calibrators prove essential for maintaining the accuracy that professional work demands. The objective measurements and automated profile creation ensure repeatability and precision that visual calibration methods cannot match. When client satisfaction and professional reputation depend on accurate color reproduction, the $170-350 investment in quality calibration hardware represents insignificant cost compared to potential revenue loss from color-inaccurate work.
For everyday users, students, and casual creative enthusiasts, built-in calibration tools provide perfectly adequate improvement over uncalibrated factory settings. The visual calibration methods deliver noticeable enhancements for typical computing, casual photo editing, and general productivity work without requiring hardware investment. If you’re editing vacation photos for social media, creating presentations for work, or simply want your monitor to look better for entertainment, software calibration suffices.
The decision point often involves asking whether color accuracy directly impacts your income or professional standing. Professional work justifies hardware calibration investment, while hobby and casual use doesn’t require that level of precision.
Is factory calibration good enough?
Some monitors from premium manufacturers like ASUS ProArt, Dell UltraSharp, BenQ ColorPro, and Eizo ColorEdge arrive with factory calibration and included certificates documenting specific Delta E measurements for that individual unit. These displays often deliver excellent accuracy out of the box, particularly for sRGB color space, and may serve professional work adequately without immediate recalibration.
However, even factory-calibrated monitors benefit from periodic recalibration for several reasons: display characteristics drift during shipping and storage before you receive the unit, optimal brightness and color temperature depend on your specific viewing environment and lighting conditions, factory calibration typically targets only sRGB color space while some workflows require AdobeRGB or DCI-P3 calibration, and panel aging affects color reproduction over time regardless of initial factory accuracy.
Treat factory calibration as excellent starting point rather than permanent solution. Professional users should still plan to calibrate or at least validate factory-calibrated displays to ensure they meet accuracy requirements in actual working conditions and recalibrate periodically to maintain accuracy as displays age.
Can I use online test images to calibrate?
Yes, online calibration resources provide useful tools for evaluating and fine-tuning monitor settings, particularly when combined with built-in operating system calibration utilities. Websites like Lagom LCD Test Pages (lagom.nl/lcd-test), Photo Friday’s Monitor Calibration Tool, and TestUFO offer specialized test patterns for different aspects of display performance.
These resources excel for: evaluating black level and white clipping points to ensure full tonal range reproduction, identifying viewing angle uniformity and IPS glow issues, testing response time and motion blur characteristics, checking for color banding in gradients, and verifying pixel integrity and backlight uniformity.
However, online test patterns cannot replace proper calibration because they rely on subjective visual assessment without objective color measurement, cannot create ICC profiles that correct monitor deviations systematically, and provide limited precision compared to hardware calibration methods.
Best practice involves using online test patterns to supplement operating system calibration wizards—first run built-in calibration tools to create basic color profiles, then use online test patterns to fine-tune brightness, contrast, and identify any issues with gradient smoothness or color uniformity.
Does calibration affect all software?
Calibration profiles affect color-managed applications that recognize and utilize ICC profiles for accurate color reproduction—this includes professional creative applications like Adobe Photoshop, Lightroom, Illustrator, Premiere Pro, DaVinci Resolve, and other professional software designed with color management support.
Operating system elements and basic applications also respect color profiles to varying degrees—web browsers like Chrome, Firefox, and Safari apply color management to images and video (though implementation varies), operating system interfaces display using the active color profile (affecting appearance of UI elements, wallpapers, etc.), and media players may or may not apply color management depending on specific software and settings.
However, some applications ignore color profiles including many games (particularly older titles without color management support), some video players with direct rendering that bypass operating system color management, and certain productivity applications not designed with color accuracy as priority.
For maximum benefit, ensure your primary creative applications support color management (most professional tools do) and verify color profile settings within individual applications—some software requires explicit color profile configuration in preferences rather than automatically detecting system profiles.
How do I know if my calibration is working?
Immediate visual comparison provides the most obvious verification—calibrated displays typically show more neutral colors (less blue or yellow cast), better defined shadow detail without crushed blacks, improved highlight detail without blown-out whites, and more natural, accurate color reproduction compared to uncalibrated factory settings.
Professional verification methods include using hardware calibrators’ validation features to measure actual Delta E values after calibration, comparing prints to screen preview to verify they match closely, viewing known reference images to ensure familiar content appears as expected, and checking whether work appears consistent across different calibrated displays.
Warning signs of calibration problems include colors appearing noticeably different than before calibration (suggesting calibration errors or incorrect targets), prints not matching screen preview any better than before calibration, work appearing dramatically different on other devices (suggesting over-calibration or incorrect color space), and color profiles not persisting after restart (indicating installation problems).
If calibration doesn’t seem to be working, verify the color profile is actually installed and active in operating system settings, ensure the calibration targeted appropriate color space for your workflow, check that applications you use actually support color management, and consider recalibrating with different target values or using different calibration tools.
What’s the difference between hardware calibration and software calibration?
Hardware calibration uses physical colorimeters that objectively measure actual displayed colors through optical sensors, eliminating subjective visual interpretation and enabling precise, repeatable measurements. The automated process creates detailed correction profiles that compensate for specific panel characteristics, typically achieving Delta E < 2 or even < 1 for professional-grade accuracy. Hardware calibration supports advanced features like ambient light measurement, monitor aging compensation, and quality assurance validation.
Software calibration relies on visual comparison methods where users adjust settings until test patterns match reference images. This subjective approach depends on user perception, viewing conditions, and the display being calibrated (using an inaccurate display to calibrate itself creates obvious challenges). Software tools cannot create the precise correction profiles that hardware measurement enables, though they still deliver meaningful improvements over uncalibrated factory settings.
The accuracy gap is substantial—hardware calibration typically achieves Delta E values of 0.5-2, while visual software calibration might achieve Delta E of 3-5. For professional work where color accuracy directly impacts output quality, hardware calibration proves essential. For casual use where noticeable improvement matters more than absolute precision, software calibration suffices.
Final Thoughts: Unlock Your Monitor’s True Potential
Calibrating your monitor doesn’t have to be overwhelming, expensive, or time-consuming—and the visual improvement absolutely proves worth the modest effort involved. Whether you’re editing a cinematic video project for commercial release, designing marketing materials for print publication, retouching professional photography for gallery exhibition, or simply want more accurate colors for YouTube streaming and everyday browsing, a well-calibrated monitor delivers clearer, more comfortable, and more accurate viewing experiences that enhance both the quality of your work and the enjoyment of using your computer.
The transformation from uncalibrated to properly calibrated displays often surprises users who assumed their expensive monitors were already performing optimally. Factory settings prioritize showroom appeal over accuracy, and the difference becomes immediately apparent once proper calibration reveals your display’s true capabilities. Colors appear more natural and neutral, shadow details emerge from previously crushed blacks, highlights maintain detail without blowing out to pure white, and the overall image quality appears more refined and professional.
The investment required—whether measured in time for software calibration or dollars for hardware tools—pays ongoing dividends through improved accuracy, reduced eye strain, greater confidence in creative work, and elimination of the frustration caused by prints that don’t match screen preview or work that appears different on other displays.
Quick Recap of Key Principles:
Use hardware calibration tools for professional-level accuracy when color-critical work demands precision that directly impacts client satisfaction and professional reputation. The $170-350 investment proves insignificant compared to potential revenue impact of color-inaccurate work.
Use built-in calibration wizards for casual improvement that delivers noticeable enhancement over factory settings without requiring specialized equipment. Even basic visual calibration dramatically improves typical monitor performance.
Adjust fundamental settings including gamma (2.2 standard), color temperature (6500K for general use), brightness (120 cd/m² typical), and ensure proper contrast for optimal image reproduction.
Recalibrate regularly to maintain accuracy as displays age—every 2-4 weeks for professional work, monthly for enthusiasts, or quarterly for casual users. Panel characteristics drift naturally over time, and periodic recalibration compensates for these changes.
Control your viewing environment by maintaining consistent lighting conditions, avoiding direct screen glare or colored reflections, and working in neutral lighting that matches calibration conditions.
Once your screen is properly calibrated, you’ll be amazed at the clarity, color accuracy, and detail you’ve been missing despite owning quality display hardware. The true potential of your monitor finally reveals itself through proper calibration—an essential step that transforms good displays into great ones and ensures your creative vision translates accurately to final output.
For additional guidance on color management, professional calibration workflows, and display technology, explore comprehensive resources from X-Rite for color management education and professional calibration techniques.